

Series ANS
-
Toilet Odor Remover, Model ANS-01PM (Plug-in Powered, Manual Touchless Control)
Vendor:ODORUNRegular price $599.00 USDRegular price -
Toilet Odor Remover, Model ANS-01RM (Rechargeable Battery Powered, Manual Touchless Control)
Vendor:ODORUNRegular price $799.00 USDRegular price -
ODORUN Battery Pack B-2510 (Compatible with ANS-01RM)
Vendor:ODORUNRegular price $252.00 USDRegular price$252.00 USDSale price $252.00 USD -
Toilet Odor Remover, Model ANS-01PA (Plug-in Powered, Automatic Touchless Control with Manual Override)
Vendor:ODORUNRegular price $799.00 USDRegular price


Compatible Toilets
ODORUN Series ANS is compatible only with standard floor-drain (floor-outlet) toilets that have visible base mounting holes on both sides of the toilet base.
This includes most standard floor-mounted toilets with traditional side mounting bolts which are most popular in the U.S. and Canada. .
Not Compatible With
ODORUN Series ANS is NOT compatible with the following toilet types or configurations:
- Skirted floor-drain toilets (no side mounting holes)
- Toilets with bidet or smart toilet seats with integrated bidets
- Wall-hung toilets
- Rear-outlet toilets
- Toilets using a rough-in kit
- Toilets with a water closet carrier system
How to Check Compatibility
Before purchasing, please check the sides of your toilet base.
If you can see mounting holes on both sides, your toilet is compatible.
If there are no visible mounting holes, this product will not fit.
Important Compatibility Disclaimer
ODORUN Series ANS is designed exclusively for toilets that meet the compatibility requirements listed above.
Please verify compatibility carefully prior to purchase.
Returns due to incompatibility may be subject to return policies.
Noise Notice & Disclaimer
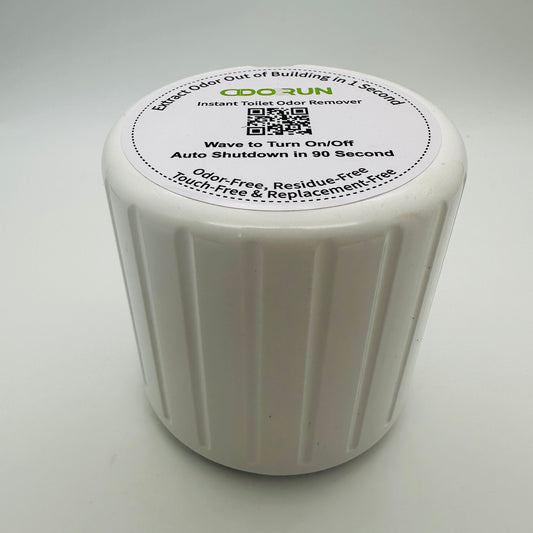
ODORUN operates at approximately 70 dB (LpA) and runs for no more than 90 seconds per use. Users can turn the unit off at any time. For reference, this noise level is similar to a household hair dryer or vacuum cleaner.
During operation, the sound may partially mask audio from mobile phones. In smaller, enclosed, or particularly quiet restrooms, some users may initially perceive the operating sound as noticeable, while others find it fully acceptable. Many users report becoming accustomed to it after several days of use. Individual sensitivity to sound varies.
By purchasing ODORUN, you acknowledge and accept the stated operating sound level.

How long does ODORUN last?
Built to Last
The ODORUN motor and ventilation system are engineered for 20,000+ hours of operation—equivalent to 8+ years of regular residential use.
It’s designed as a long-term fixture in your bathroom—a permanent solution, just like your toilet.
Does ODORUN have official certifications?
ODORUN is FCC certified, and its power adapter is UL certified, meeting U.S. safety and compliance standards.
You can install and operate ODORUN with confidence, knowing it adheres to recognized electrical and regulatory requirements.
Do I have to install an outlet behind the toilet?
Power Options
ODORUN is available in two configurations:
Rechargeable Version
• Requires charging approximately every 2–3 weeks, depending on usage frequency.
Plug-In Version
• Connects to a standard outlet.
• An extension cord may be used if needed for installation flexibility.
Are there any additional installation costs?
Installation
The plumbing installation of the ODORUN unit is typically a fixed-cost service and may be completed by a licensed plumber or as a DIY installation, depending on user preference and skill level.
Any required electrical work will vary based on site conditions and must be performed by a licensed electrician in compliance with applicable local building codes and regulations.
Warranty & Return Policy
1. 30-Day Return & Exchange Policy
ODORUN offers a 30-day return or exchange policy from the date of delivery.
To be eligible:
- The product must be returned in its original condition.
- All components, accessories, and packaging must be included.
- The product must not show signs of misuse, improper installation, modification, or damage caused by external factors.
Returns requested solely due to user preference (including acceptable operating noise within specification) must meet the above conditions.
Shipping fees may be non-refundable unless the return is due to a verified manufacturing defect.
2. One-Year Limited Warranty (Complete Unit)
ODORUN provides a one (1) year limited warranty covering defects in materials and workmanship under normal residential or commercial use.
During the warranty period, ODORUN will, at its discretion:
- Repair the defective product, or
- Replace the product with a new or refurbished unit of equivalent performance.
This warranty applies only to products purchased through authorized sales channels.
3. Three-Year Limited Warranty (Main Unit)
The ODORUN main unit (core mechanical and vacuum system) is covered by a three (3) year limited warranty against manufacturing defects.
This extended coverage applies exclusively to the main unit and does not include:
- Consumable components
- Cosmetic wear
- External accessories
- Damage caused by improper installation or modification
4. What Is Not Covered
This warranty does not cover:
- Normal wear and tear
- Damage caused by misuse, negligence, improper installation, or unauthorized repairs
- Damage due to electrical surges, environmental conditions, or plumbing system irregularities
- Dissatisfaction based on normal operating characteristics within stated specifications (including sound level ≤70 dB(A))
5. Warranty Claim Process
To initiate a warranty claim, please contact:
Email: info@odorun.com
Please include:
- Proof of purchase
- Product serial number
- Description of the issue
- Photos or videos if applicable
ODORUN reserves the right to inspect or request return of the product before approving warranty service.
6. Limitation of Liability
ODORUN’s liability is limited to repair or replacement of the product.
ODORUN shall not be liable for installation and indirect, incidental, or consequential damages arising from product use.

Toilet Removal & Preparation Steps
1. Turn off the water supply to the toilet and flush the tank completely.
2. Remove any remaining water from the tank and bowl using a sponge or towel.
3. Disconnect the water supply line from the fill valve.
4. Remove the toilet bowl from the floor by taking off the bolt caps and loosening the floor bolt nuts. Carefully lift the toilet and set it aside.
5. Remove the floor bolts from the closet flange. Thoroughly clean all old wax, putty, and sealant from:
- the floor surface
- the closet flange
- the bottom of the toilet
Pay special attention to removing old wax around the toilet mounting holes.
6. Temporarily plug the floor flange with a towel or cover to prevent sewer gases from escaping.
7. Insert the ventilation bolt through the mounting hole to check clearance.
- If the ventilation bolt passes through freely, no modification is required.
8. If clearance is insufficient, use a grinding bit to enlarge the left mounting hole (when facing the toilet) until the ventilation bolt can pass through smoothly.
Install the ventilation flange and bolt on the closet flange
1. Evaluate site conditions to determine which ventilation bolt foot should be used.
- Selection depends on floor height, closet flange elevation, and available clearance.
- Refer to the ODORUN User Manual for detailed selection guidance.
2. Insert the flat side pipe of the ventilation bolt into the side opening of the ventilation flange.
- Adjust the insertion depth as necessary to ensure proper alignment and fit.
3. Position the ventilation flange assembly on top of the toilet closet flange:
- Ensure the ventilation bolt is fully seated in the left mounting groove of the closet flange (when facing the toilet).
- Install the standard mounting bolt into the right mounting groove of the closet flange.
- Place the plastic washer onto the mounting bolt to keep it vertical and properly aligned.
4. Perform a press test to verify proper seating:
- Press down firmly on two opposite sides of the ODORUN ventilation flange.
- If no noticeable rocking or wobbling occurs, the ventilation flange and closet flange are in full contact, indicating an effective seal.
5. Install the wax ring:
- Place a standard wax ring onto the ventilation flange.
- Press firmly to ensure the wax ring adheres securely to the ventilation flange surface.
- Do not use a reinforced wax ring or wax ring with a plastic horn/cone.
Refit the toilet and perform a flushing test
1. Refit the Toilet
Important: Remove the temporary plug from the floor flange before placing the toilet bowl.
1. Carefully place the toilet bowl over the closet flange and ventilation flange, aligning it with the ventilation bolt and the mounting bolt so that both bolts protrude through the mounting holes at the base of the toilet.
2. Press down firmly on the toilet bowl to compress the wax ring and ensure the toilet is fully seated.
3. Confirm the toilet is stable and level.
- If necessary, install shims to eliminate rocking and achieve proper alignment.
2. Secure the Toilet and Perform a Flushing Test
1. Place the metal washer onto the mounting bolt and tighten the mounting nut to secure the toilet.
- Tighten evenly.
- Do not overtighten, as excessive force may crack the porcelain base.
2. Insert the converter onto the ventilation bolt and thread the converter nut onto the base of the toilet. Tighten securely.
3. Install the cap cover over the converter nut.
4. Attach the conversion adapter to the end of the ventilation bolt.
- Ensure correct orientation (observe the UP/DOWN marking on the adapter).
5. Reconnect the water supply line to the fill valve.
6. Turn on the water supply valve and allow the tank to fill completely.
7. Perform a flushing test:
- Flush the toilet several times.
- Inspect all water supply connections and the base of the toilet for leaks.
- Tighten connections if necessary.
Note: Do not overtighten the tank connection or water supply fittings.
Remove the toilet seat and lid
1. Remove the existing toilet seat and lid assembly according to the manufacturer’s instructions.
- Loosen and remove the seat mounting bolts.
- Lift the seat and lid off the bowl.
2. Thoroughly clean the toilet surface to ensure proper installation of subsequent components.
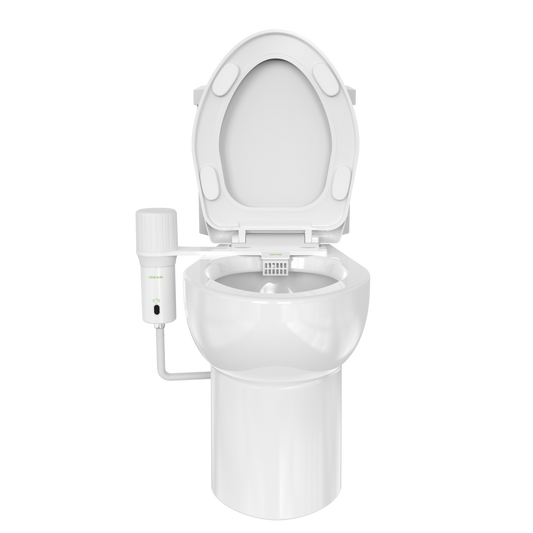
Install the air suction unit and the main unit
1. Install the air suction unit onto the toilet bowl.
- Ensure proper positioning and full contact with the mounting surface.
- Confirm that the sealing interface is correctly aligned.
2. Reattach the toilet seat and secure it according to the seat manufacturer’s specifications.
- Tighten evenly.
- Do not overtighten to avoid damaging the porcelain.
3. Connect the main unit to the air suction unit.
- Ensure the internal gasket is properly seated.
- Verify that the connection is fully inserted and airtight to prevent leakage or loss of suction performance.
Connect the system and conduct a power-on test
1. Connect the main unit to the conversion adapter using the stainless steel corrugated pipe.
- Ensure the internal gasket is properly seated.
- Tighten the connections securely to achieve an airtight seal.
2. Connect the power cable to the electrical adapter and plug it into a suitable power outlet.
3. Power on the main unit:
- Wave your hand near the sensor area, or
- Press the control button located on the underside of the main unit.
4. Inspect all air connections:
- Check for any air leakage at pipe joints and connection points.
- Tighten or adjust components as necessary to ensure proper sealing and optimal suction performance.